
diff options
Diffstat (limited to 'docs/beep-beep')
| -rw-r--r-- | docs/beep-beep/build.md | 16 | ||||
| -rw-r--r-- | docs/beep-beep/cli.md | 51 | ||||
| -rw-r--r-- | docs/beep-beep/health.md | 30 | ||||
| -rw-r--r-- | docs/beep-beep/http-error-codes.md | 12 | ||||
| -rw-r--r-- | docs/beep-beep/jobs.md | 1166 | ||||
| -rw-r--r-- | docs/beep-beep/kv.md | 679 | ||||
| -rw-r--r-- | docs/beep-beep/local-dev-env.md | 0 | ||||
| -rw-r--r-- | docs/beep-beep/logging.md | 109 | ||||
| -rw-r--r-- | docs/beep-beep/metrics.md | 81 | ||||
| -rw-r--r-- | docs/beep-beep/plugin.md | 246 | ||||
| -rw-r--r-- | docs/beep-beep/production.md | 31 | ||||
| -rw-r--r-- | docs/beep-beep/pubsub.md | 14 | ||||
| -rw-r--r-- | docs/beep-beep/reload.md | 28 | ||||
| -rw-r--r-- | docs/beep-beep/rpc.md | 32 | ||||
| -rw-r--r-- | docs/beep-beep/service.md | 43 | ||||
| -rw-r--r-- | docs/beep-beep/systemd.md | 20 | ||||
| -rw-r--r-- | docs/beep-beep/websockets.md | 45 |
17 files changed, 2603 insertions, 0 deletions
diff --git a/docs/beep-beep/build.md b/docs/beep-beep/build.md new file mode 100644 index 00000000..fac83f9a --- /dev/null +++ b/docs/beep-beep/build.md @@ -0,0 +1,16 @@ +# Building a Server + +RoadRunner use Endure to manage dependencies, this allows you to tweak and extend application functionality for each separate project. + +#### Install Golang + +To build an application server you need [Golang 1.16+](https://golang.org/dl/) to be installed. + +#### Step-by-step walkthrough + +1. Fork or clone [roadrunner-binary](https://github.com/spiral/roadrunner-binary/) repository. +2. Feel free to modify plugins list or add your custom plugins to the [Plugins](https://github.com/spiral/roadrunner-binary/blob/master/internal/container/plugins.go). + +You can now start your server without building `go run cmd/rr/main.go serve`. + +> See how to create [http middleware](/http/middleware.md) in order to intercept HTTP flow. diff --git a/docs/beep-beep/cli.md b/docs/beep-beep/cli.md new file mode 100644 index 00000000..2d454e0c --- /dev/null +++ b/docs/beep-beep/cli.md @@ -0,0 +1,51 @@ +# Server Commands + +RoadRunner application can be started by calling a simple command from the root of your PHP application. + +``` +$ rr serve +``` + +You can also start RoadRunner using configuration from custom location: + +``` +$ rr serve -c ./app/.rr.yaml +``` + +To reload all RoadRunner services: + +``` +$ rr reset +``` + +> You can attach this command as file watcher in your IDE. + +To reset only particular plugins: + +``` +$ rr reset http +``` + +To run golang pprof server (debug mode): + +``` +$ rr serve -d -c .rr.yaml +``` + +To view the status of all active workers in an interactive mode. + +``` +$ rr workers -i +``` + +``` +Workers of [http]: ++---------+-----------+---------+---------+-----------------+ +| PID | STATUS | EXECS | MEMORY | CREATED | ++---------+-----------+---------+---------+-----------------+ +| 9440 | ready | 42,320 | 31 MB | 22 days ago | +| 9447 | ready | 42,329 | 31 MB | 22 days ago | +| 9454 | ready | 42,306 | 31 MB | 22 days ago | +| 9461 | ready | 42,316 | 31 MB | 22 days ago | ++---------+-----------+---------+---------+-----------------+ +``` diff --git a/docs/beep-beep/health.md b/docs/beep-beep/health.md new file mode 100644 index 00000000..1d6e90da --- /dev/null +++ b/docs/beep-beep/health.md @@ -0,0 +1,30 @@ +# Health Endpoint
+RoadRunner server includes a health check endpoint that returns the health of the workers.
+
+## Enable health
+
+To enable the health check endpoint, add a `status` section to your configuration:
+
+```yaml
+status:
+ address: localhost:2114
+```
+
+To access the health-check use the following URL:
+
+`http://localhost:2114/health?plugin=http`
+
+> You can check one or multiple plugins using health-check. Currently, only HTTP supported.
+
+Once enabled, the health check endpoint will respond with the following:
+
+ - `HTTP 200` if there is at least **one worker** ready to serve requests.
+ - `HTTP 500` if there are **no workers** ready to service requests.
+
+## Use cases
+
+The health check endpoint can be used for the following:
+
+ - [Kubernetes readiness and liveness probes](https://kubernetes.io/docs/tasks/configure-pod-container/configure-liveness-readiness-startup-probes/)
+ - [AWS target group health checks](https://docs.aws.amazon.com/elasticloadbalancing/latest/application/target-group-health-checks.html)
+ - [GCE Load Balancing health checks](https://cloud.google.com/load-balancing/docs/health-checks)
diff --git a/docs/beep-beep/http-error-codes.md b/docs/beep-beep/http-error-codes.md new file mode 100644 index 00000000..381c5d77 --- /dev/null +++ b/docs/beep-beep/http-error-codes.md @@ -0,0 +1,12 @@ +### Overriding HTTP default error code + +```yaml +http: + # override http error code for the application errors (default 500) + appErrorCode: 505 + # override http error code for the internal RR errors (default 500) + internalErrorCode: 505 +``` + +By default, `http.InternalServerError` code is used, but, for the load balancer might be better to use different code [Feature Request](https://github.com/spiral/roadrunner/issues/471). +These 2 options allow overriding default error code (500) for the internal errors such as `ErrNoPoolAttached` and application error from the PHP.
\ No newline at end of file diff --git a/docs/beep-beep/jobs.md b/docs/beep-beep/jobs.md new file mode 100644 index 00000000..3aa4e1c0 --- /dev/null +++ b/docs/beep-beep/jobs.md @@ -0,0 +1,1166 @@ +# Jobs + +Starting with RoadRunner >= 2.4, a queuing system (aka "jobs") is available. +This plugin allows you to move arbitrary "heavy" code into separate tasks to +execute them asynchronously in an external worker, which will be referred to +as "consumer" in this documentation. + +The RoadRunner PHP library provides both API implementations: The client one, +which allows you to dispatch tasks, and the server one, which provides the +consumer who processes the tasks. + +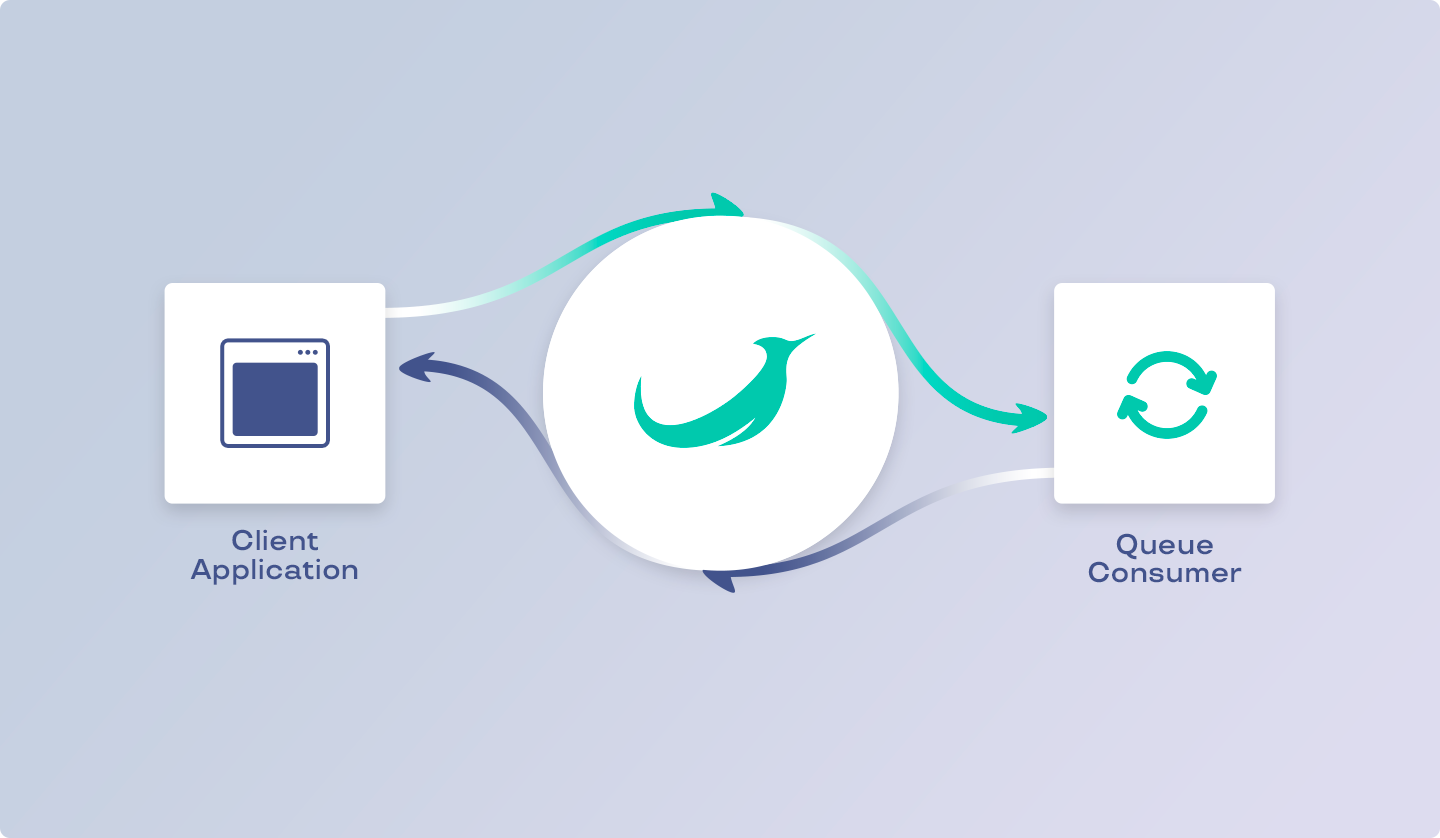 + +## Installation + +> **Requirements** +> - PHP >= 7.4 +> - RoadRunner >= 2.4 +> - *ext-protobuf (optional)* + +To get access from the PHP code, you should put the corresponding dependency +using [the Composer](https://getcomposer.org/). + +```sh +$ composer require spiral/roadrunner-jobs +``` + +## Configuration + +After installing all the required dependencies, you need to configure this +plugin. To enable it add `jobs` section to your configuration. + +For example, in this way, you can configure both the client and server parts to +work with RabbitMQ. + +```yaml +# +# RPC is required for tasks dispatching (client) +# +rpc: + listen: tcp://127.0.0.1:6001 + +# +# This section configures the task consumer (server) +# +server: + command: php consumer.php + relay: pipes + +# +# In this section, the jobs themselves are configured +# +jobs: + consume: [ "test" ] # List of RoadRunner queues that can be processed by + # the consumer specified in the "server" section. + pipelines: + test: # RoadRunner queue identifier + driver: memory # - Queue driver name + queue: test # - Internal (driver's) queue identifier +``` + +- The `rpc` section is responsible for client settings. It is at this address + that we will connect, *dispatching tasks* to the queue. + +- The `server` section is responsible for configuring the server. Previously, we + have already met with its description when setting up the [PHP Worker](/php/worker.md). + +- And finally, the `jobs` section is responsible for the work of the queues + themselves. It contains information on how the RoadRunner should work with + connections to drivers, what can be handled by the consumer, and other + queue-specific settings. + +### Common Configuration + +Let's now focus on the common settings of the queue server. In full, it may +look like this: + +```yaml +jobs: + num_pollers: 64 + timeout: 60 + pipeline_size: 100000 + pool: + num_workers: 10 + allocate_timeout: 60s + destroy_timeout: 60s + consume: [ "queue-name" ] + pipelines: + queue-name: + driver: # "[DRIVER_NAME]" + # And driver-specific configuration below... +``` + +Above is a complete list of all possible common Jobs settings. Let's now figure +out what they are responsible for. + +- `num_pollers` - The number of threads that concurrently read from the priority + queue and send payloads to the workers. There is no optimal number, it's + heavily dependent on the PHP worker's performance. For example, "echo workers" + may process over 300k jobs per second within 64 pollers (on 32 core CPU). + +- `timeout` - The internal timeouts via golang context (in seconds). For + example, if the connection was interrupted or your push in the middle of the + redial state with 10 minutes timeout (but our timeout is 1 min for example), + or queue is full. If the timeout exceeds, your call will be rejected with an + error. Default: 60 (seconds). + +- `pipeline_size` - The "binary heaps" priority queue (PQ) settings. Priority + queue stores jobs inside according to its' priorities. Priority might be set + for the job or inherited by the pipeline. If worker performance is poor, PQ + will accumulate jobs until `pipeline_size` will be reached. After that, PQ + will be blocked until workers process all the jobs inside. + + Blocked PQ means, that you can push the job into the driver, but RoadRunner + will not read that job until PQ will be empty. If RoadRunner will be killed + with jobs inside the PQ, they won't be lost, because jobs are deleted from the + drivers' queue only after Ack. + +- `pool` - All settings in this section are similar to the worker pool settings + described on the [configuration page](https://roadrunner.dev/docs/intro-config). + +- `consume` - Contains an array of the names of all queues specified in the + `"pipelines"` section, which should be processed by the concierge specified in + the global `"server"` section (see the [PHP worker's settings](/php/worker.md)). + +- `pipelines` - This section contains a list of all queues declared in the + RoadRunner. The key is a unique *queue identifier*, and the value is an object + from the settings specific to each driver (we will talk about it later). + +### Memory Driver + +This type of driver is already supported by the RoadRunner and does not require +any additional installations. + +Note that using this type of queue driver, all data is in memory and will be +destroyed when the RoadRunner Server is restarted. If you need persistent +queue, then it is recommended to use alternative drivers: `amqp`, `beanstalk` +or `sqs`. + +The complete `memory` driver configuration looks like this: + +```yaml +jobs: + pipelines: + # User defined name of the queue. + example: + # Required section. + # Should be "memory" for the in-memory driver. + driver: memory + + # Optional section. + # Default: 10 + priority: 10 + + # Optional section. + # Default: 10 + prefetch: 10 +``` + +Below is a more detailed description of each of the in-memory-specific options: +- `priority` - Queue default priority for each task pushed into this queue + if the priority value for these tasks was not explicitly set. + +- `prefetch` - A local buffer between the PQ (priority queue) and driver. If the + PQ size is set to 100 and prefetch to 100000, you'll be able to push up to + prefetch number of jobs even if PQ is full. + +> Please note that this driver cannot hold more than 1000 tasks with delay at +> the same time (RR limitation) + +### Local (based on the boltdb) Driver + +This type of driver is already supported by the RoadRunner and does not require +any additional installations. It uses boltdb as its main storage for the jobs. This driver should be used locally, for +testing or developing purposes. It can be used in the production, but this type of driver can't handle +huge load. Maximum RPS it can have no more than 30-50. + +Data in this driver persists in the boltdb database file. You can't open same file simultaneously for the 2 pipelines or +for the KV plugin and Jobs plugin. This is boltdb limitation on concurrent access from the 2 processes to the same file. + +The complete `boltdb` driver configuration looks like this: + +```yaml + +boltdb: + permissions: 0777 + +jobs: + pipelines: + # User defined name of the queue. + example: + # Required section. + # Should be "boltdb" for the local driver. + driver: boltdb + + # Optional section. + # Default: 10 + priority: 10 + + # Optional section. + # Default: 1000 + prefetch: 1000 +``` + +Below is a more detailed description of each of the in-memory-specific options: +- `priority` - Queue default priority for each task pushed into this queue + if the priority value for these tasks was not explicitly set. + +- `prefetch` - A local buffer between the PQ (priority queue) and driver. If the + PQ size is set to 100 and prefetch to 100000, you'll be able to push up to + prefetch number of jobs even if PQ is full. + +- `file` - boltdb database file to use. Might be a path with file: `foo/bar/rr1.db`. Default: `rr.db`. + + +### AMQP Driver + +Strictly speaking, AMQP (and 0.9.1 version used) is a protocol, not a full-fledged driver, so you can use +any servers that support this protocol (on your own, only rabbitmq was tested) , such as: +[RabbitMQ](https://www.rabbitmq.com/), [Apache Qpid](http://qpid.apache.org/) or +[Apache ActiveMQ](http://activemq.apache.org/). However, it is recommended to +use RabbitMQ as the main implementation, and reliable performance with other +implementations is not guaranteed. + +To install and configure the RabbitMQ, use the corresponding +[documentation page](https://www.rabbitmq.com/download.html). After that, you +should configure the connection to the server in the "`amqp`" section. This +configuration section contains exactly one `addr` key with a +[connection DSN](https://www.rabbitmq.com/uri-spec.html). + +```yaml +amqp: + addr: amqp://guest:guest@localhost:5672 +``` + +After creating a connection to the server, you can create a new queue that will +use this connection and which will contain the queue settings (including +amqp-specific): + +```yaml +amqp: + addr: amqp://guest:guest@localhost:5672 + + +jobs: + pipelines: + # User defined name of the queue. + example: + # Required section. + # Should be "amqp" for the AMQP driver. + driver: amqp + + # Optional section. + # Default: 10 + priority: 10 + + # Optional section. + # Default: 100 + prefetch: 100 + + # Optional section. + # Default: "default" + queue: "default" + + # Optional section. + # Default: "amqp.default" + exchange: "amqp.default" + + # Optional section. + # Default: "direct" + exchange_type: "direct" + + # Optional section. + # Default: "" (empty) + routing_key: "" + + # Optional section. + # Default: false + exclusive: false + + # Optional section. + # Default: false + multiple_ack: false + + # Optional section. + # Default: false + requeue_on_fail: false +``` + +Below is a more detailed description of each of the amqp-specific options: +- `priority` - Queue default priority for for each task pushed into this queue + if the priority value for these tasks was not explicitly set. + +- `prefetch` - The client can request that messages be sent in advance so that + when the client finishes processing a message, the following message is + already held locally, rather than needing to be sent down the channel. + Prefetching gives a performance improvement. This field specifies the prefetch + window size in octets. See also ["prefetch-size"](https://www.rabbitmq.com/amqp-0-9-1-reference.html) + in AMQP QoS documentation reference. + +- `queue` - AMQP internal (inside the driver) queue name. + +- `exchange` - The name of AMQP exchange to which tasks are sent. Exchange + distributes the tasks to one or more queues. It routes tasks to the queue + based on the created bindings between it and the queue. See also + ["AMQP model"](https://www.rabbitmq.com/tutorials/amqp-concepts.html#amqp-model) + documentation section. + +- `exchange_type` - The type of task delivery. May be one of `direct`, `topics`, + `headers` or `fanout`. + - `direct` - Used when a task needs to be delivered to specific queues. The + task is published to an exchanger with a specific routing key and goes to + all queues that are associated with this exchanger with a similar routing + key. + - `topics` - Similarly, `direct` exchange enables selective routing by + comparing the routing key. But, in this case, the key is set using a + template, like: `user.*.messages`. + - `fanout` - All tasks are delivered to all queues even if a routing key is + specified in the task. + - `headers` - Routes tasks to related queues based on a comparison of the + (key, value) pairs of the headers property of the binding and the similar + property of the message. + + - `routing_key` - Queue's routing key. + + - `exclusive` - Exclusive queues can't be redeclared. If set to true and + you'll try to declare the same pipeline twice, that will lead to an error. + + - `multiple_ack` - This delivery and all prior unacknowledged deliveries on + the same channel will be acknowledged. This is useful for batch processing + of deliveries. Applicable only for the Ack, not for the Nack. + + - `requeue_on_fail` - Requeue on Nack. + +### Beanstalk Driver + +Beanstalk is a simple and fast general purpose work queue. To install Beanstalk, +you can use the [local queue server](https://github.com/beanstalkd/beanstalkd) +or run the server inside [AWS Elastic](https://aws.amazon.com/elasticbeanstalk/). +You can choose any option that is convenient for you. + +Setting up the server is similar to setting up AMQP and requires specifying the +connection in the `"beanstalk"` section of your RoadRunner configuration file. + +```yaml +beanstalk: + addr: tcp://127.0.0.1:11300 +``` + +After setting up the connection, you can start using it. Let's take a look at +the complete config with all the options for this driver: + +```yaml +beanstalk: + # Optional section. + # Default: tcp://127.0.0.1:11300 + addr: tcp://127.0.0.1:11300 + + # Optional section. + # Default: 30s + timeout: 10s + +jobs: + pipelines: + # User defined name of the queue. + example: + # Required section. + # Should be "beanstalk" for the Beanstalk driver. + driver: beanstalk + + # Optional section. + # Default: 10 + priority: 10 + + # Optional section. + # Default: 1 + tube_priority: 1 + + # Optional section. + # Default: default + tube: default + + # Optional section. + # Default: 5s + reserve_timeout: 5s +``` + +These are all settings that are available to you for configuring this type of +driver. Let's take a look at what they are responsible for: +- `priority` - Similar to the same option in other drivers. This is queue + default priority for for each task pushed into this queue if the priority + value for these tasks was not explicitly set. + +- `tube_priority` - The value for specifying the priority within Beanstalk is + the internal priority of the server. The value should not exceed `int32` size. + +- `tube` - The name of the inner "tube" specific to the Beanstalk driver. + +### SQS Driver + +[Amazon SQS (Simple Queue Service)](https://aws.amazon.com/sqs/) is an +alternative queue server also developed by Amazon and is also part of the AWS +service infrastructure. If you prefer to use the "cloud" option, then you can +use the [ready-made documentation](https://docs.aws.amazon.com/AWSSimpleQueueService/latest/SQSDeveloperGuide/sqs-configuring.html) +for its installation. + +In addition to the possibility of using this queue server within the AWS, you +can also use the local installation of this system on your own servers. If you +prefer this option, then you can use [softwaremill's implementation](https://github.com/softwaremill/elasticmq) +of the Amazon SQS server. + +After you have created the SQS server, you need to specify the following +connection settings in `sqs` configuration settings. Unlike AMQP and Beanstalk, +SQS requires more values to set up a connection and will be different from what +we're used to: + +```yaml +sqs: + # Required AccessKey ID. + # Default: empty + key: access-key + + # Required secret access key. + # Default: empty + secret: api-secret + + # Required AWS region. + # Default: empty + region: us-west-1 + + # Required AWS session token. + # Default: empty + session_token: test + + # Required AWS SQS endpoint to connect. + # Default: http://127.0.0.1:9324 + endpoint: http://127.0.0.1:9324 +``` + +> Please note that although each of the sections contains default values, it is +> marked as "required". This means that in almost all cases they are required to +> be specified in order to correctly configure the driver. + +After you have configured the connection - you should configure the queue that +will use this connection: + +```yaml +sqs: + # SQS connection configuration... + +jobs: + pipelines: + # Required section. + # Should be "sqs" for the Amazon SQS driver. + driver: sqs + + # Optional section. + # Default: 10 + prefetch: 10 + + # Optional section. + # Default: 0 + visibility_timeout: 0 + + # Optional section. + # Default: 0 + wait_time_seconds: 0 + + # Optional section. + # Default: default + queue: default + + # Optional section. + # Default: empty + attributes: + DelaySeconds: 42 + # etc... see https://docs.aws.amazon.com/AWSSimpleQueueService/latest/APIReference/API_SetQueueAttributes.html + + # Optional section. + # Default: empty + tags: + test: "tag" +``` + +Below is a more detailed description of each of the SQS-specific options: +- `prefetch` - Number of jobs to prefetch from the SQS. Amazon SQS never returns + more messages than this value (however, fewer messages might be returned). + Valid values: 1 to 10. Any number bigger than 10 will be rounded to 10. + Default: `10`. + +- `visibility_timeout` - The duration (in seconds) that the received messages + are hidden from subsequent retrieve requests after being retrieved by a + ReceiveMessage request. Max value is 43200 seconds (12 hours). Default: `0`. + +- `wait_time_seconds` - The duration (in seconds) for which the call waits for + a message to arrive in the queue before returning. If a message is available, + the call returns sooner than WaitTimeSeconds. If no messages are available and + the wait time expires, the call returns successfully with an empty list of + messages. Default: `5`. + +- `queue` - SQS internal queue name. Can contain alphanumeric characters, + hyphens (-), and underscores (_). Default value is `"default"` string. + +- `attributes` - List of the [AWS SQS attributes](https://docs.aws.amazon.com/AWSSimpleQueueService/latest/APIReference/API_SetQueueAttributes.html). +> For example +> ```yaml +> attributes: +> DelaySeconds: 0 +> MaximumMessageSize: 262144 +> MessageRetentionPeriod: 345600 +> ReceiveMessageWaitTimeSeconds: 0 +> VisibilityTimeout: 30 +> ``` + +- `tags` - Tags don't have any semantic meaning. Amazon SQS interprets tags as + character. +> Please note that this functionality is rarely used and slows down the work of +> queues: https://docs.aws.amazon.com/AWSSimpleQueueService/latest/SQSDeveloperGuide/sqs-queue-tags.html + +## Client (Producer) + +Now that we have configured the server, we can start writing our first code for +sending the task to the queue. But before doing this, we need to connect to our +server. And to do this, it is enough to create a `Jobs` instance. + +```php +// Server Connection +$jobs = new Spiral\RoadRunner\Jobs\Jobs(); +``` + +Please note that in this case we have not specified any connection settings. And +this is really not required if this code is executed in a RoadRunner environment. +However, in the case that a connection is required to be established +from a third-party application (for example, a CLI command), then the settings +must be specified explicitly. + +```php +$jobs = new Spiral\RoadRunner\Jobs\Jobs( + // Expects RPC connection + Spiral\Goridge\RPC\RPC::create('tcp://127.0.0.1:6001') +); +``` + +After we have established the connection, we should check the server +availability and in this case the API availability for the jobs. This can be +done using the appropriate `isAvailable()` method. When the connection is +created, and the availability of the functionality is checked, we can connect to +the queue we need using `connect()` method. + +```php +$jobs = new Spiral\RoadRunner\Jobs\Jobs(); + +if (!$jobs->isAvailable()) { + throw new LogicException('The server does not support "jobs" functionality =('); +} + +$queue = $jobs->connect('queue-name'); +``` + +### Task Creation + +Before submitting a task to the queue, you should create this task. To create a +task, it is enough to call the corresponding `create()` method. + +```php +$task = $queue->create(SendEmailTask::class); +// Expected: +// object(Spiral\RoadRunner\Jobs\Task\PreparedTaskInterface) +``` + +> Note that the name of the task does not have to be a class. Here we are using +> `SendEmailTask` just for convenience. + +Also, this method takes an additional second argument with additional data to +complete this task. + +```php +$task = $queue->create(SendEmailTask::class, ['email' => '[email protected]']); +``` + +You can also use this task as a basis for creating several others. + +```php +$task = $queue->create(SendEmailTask::class); + +$first = $task->withValue('[email protected]'); +$second = $task->withValue('[email protected]'); +``` + +### Task Dispatching + +And to send tasks to the queue, we can use different methods: +`dispatch()` and `dispatchMany()`. The difference between these two +implementations is that the first one sends a task to the queue, returning a +dispatched task object, while the second one dispatches multiple tasks, +returning an array. Moreover, the second method provides one-time delivery of +all tasks in the array, as opposed to sending each task separately. + +```php +$a = $queue->create(SendEmailTask::class, ['email' => '[email protected]']); +$b = $queue->create(SendEmailTask::class, ['email' => '[email protected]']); + +foreach ([$a, $b] as $task) { + $result = $queue->dispatch($task); + // Expected: + // object(Spiral\RoadRunner\Jobs\Task\QueuedTaskInterface) +} + +// Using a batching send +$result = $queue->dispatchMany($a, $b); +// Expected: +// array(2) { +// object(Spiral\RoadRunner\Jobs\Task\QueuedTaskInterface), +// object(Spiral\RoadRunner\Jobs\Task\QueuedTaskInterface) +// } +``` + +### Task Immediately Dispatching + +In the case that you do not want to create a new task and then immediately +dispatch it, you can simplify the work by using the `push` method. However, this +functionality has a number of limitations. In case of creating a new task: +- You can flexibly configure additional task capabilities using a convenient + fluent interface. +- You can prepare a common task for several others and use it as a basis to + create several alternative tasks. +- You can create several different tasks and collect them into one collection + and send them to the queue at once (using the so-called batching). + +In the case of immediate dispatch, you will have access to only the basic +features: The `push()` method accepts one required argument with the +name of the task and two optional arguments containing additional data for the +task being performed and additional sending options (for example, a delay). +Moreover, this method is designed to send only one task. + +```php +use Spiral\RoadRunner\Jobs\Options; + +$payload = ['email' => $email, 'message' => $message]; + +$task = $queue->push(SendEmailTask::class, $payload, new Options( + delay: 60 // in seconds +)); +``` + +### Task Payload + +As you can see, each task, in addition to the name, can contain additional data +(payload) specific to a certain type of task. You yourself can determine what +data should be transferred to the task and no special requirements are imposed +on them, except for the main ones: Since this task is then sent to the queue, +they must be serializable. + +> The default serializer used in jobs allows you to pass anonymous functions +> as well. + +In case to add additional data, you can use the optional second argument +provided by the `create()` and `push()` methods, or you can use the fluent +interface to supplement or modify the task data. Everything is quite simple +here; you can add data using the `withValue()` method, or delete them using the +`withoutValue()` method. + +The first argument of the `withValue()` method passes a payload value as the +required first argument. If you also need to specify a key for it, just pass it +as an optional second argument. + +```php +$task = $queue->create(CreateBackup::class) + ->withValue('/var/www') + ->withValue(42, 'answer') + ->withValue('/dev/null', 'output'); + +// An example like this will be completely equivalent to if we passed +// all this data at one time +$task = $queue->create(CreateBackup::class, [ + '/var/www', + 'answer' => 42, + 'output' => '/dev/null' +]); + +// On the other hand, we don't need an "answer"... +$task = $task->withoutValue('answer'); +``` + +### Task Headers + +In addition to the data itself, we can send additional metadata that is not +related to the payload of the task, that is, headers. In them, we can pass +any additional information, for example: Encoding of messages, their format, +the server's IP address, the user's token or session id, etc. + +Headers can only contain string values and are not serialized in any way during +transmission, so be careful when specifying them. + +In the case to add a new header to the task, you can use methods +[similar to PSR-7](https://www.php-fig.org/psr/psr-7/). That is: +- `withHeader(string, iterable<string>|string): self` - Return an instance with + the provided value replacing the specified header. +- `withAddedHeader(string, iterable<string>|string): self` - Return an instance + with the specified header appended with the given value. +- `withoutHeader(string): self` - Return an instance without the specified header. + +```php +$task = $queue->create(RestartServer::class) + ->withValue('addr', '127.0.0.1') + ->withAddedHeader('access-token', 'IDDQD'); + +$queue->dispatch($task); +``` + +### Task Delayed Dispatching + +If you want to specify that a job should not be immediately available for +processing by a jobs worker, you can use the delayed job option. +For example, let's specify that a job shouldn't be available for processing +until 42 minutes after it has been dispatched: + +```php +$task = $queue->create(SendEmailTask::class) + ->withDelay(42 * 60); // 42 min * 60 sec +``` + +## Consumer Usage + +You probably already noticed that when [setting up a jobs consumer](#configuration), +the `"server"` configuration section is used in which a PHP file-handler is defined. +Exactly the same one we used earlier to write a [HTTP Worker](/php/worker.md). +Does this mean that if we want to use the Jobs Worker, then we can no longer +use the HTTP Worker? No it is not! + +During the launch of the RoadRunner, it spawns several workers defined in the +`"server"` config section (by default, the number of workers is equal to the +number of CPU cores). At the same time, during the spawn of the workers, it +transmits in advance to each of them information about the *mode* in which this +worker will be used. The information about the *mode* itself is contained in the +environment variable `RR_ENV` and for the HTTP worker the value will correspond +to the `"http"`, and for the Jobs worker the value of `"jobs"` will be stored +there. + +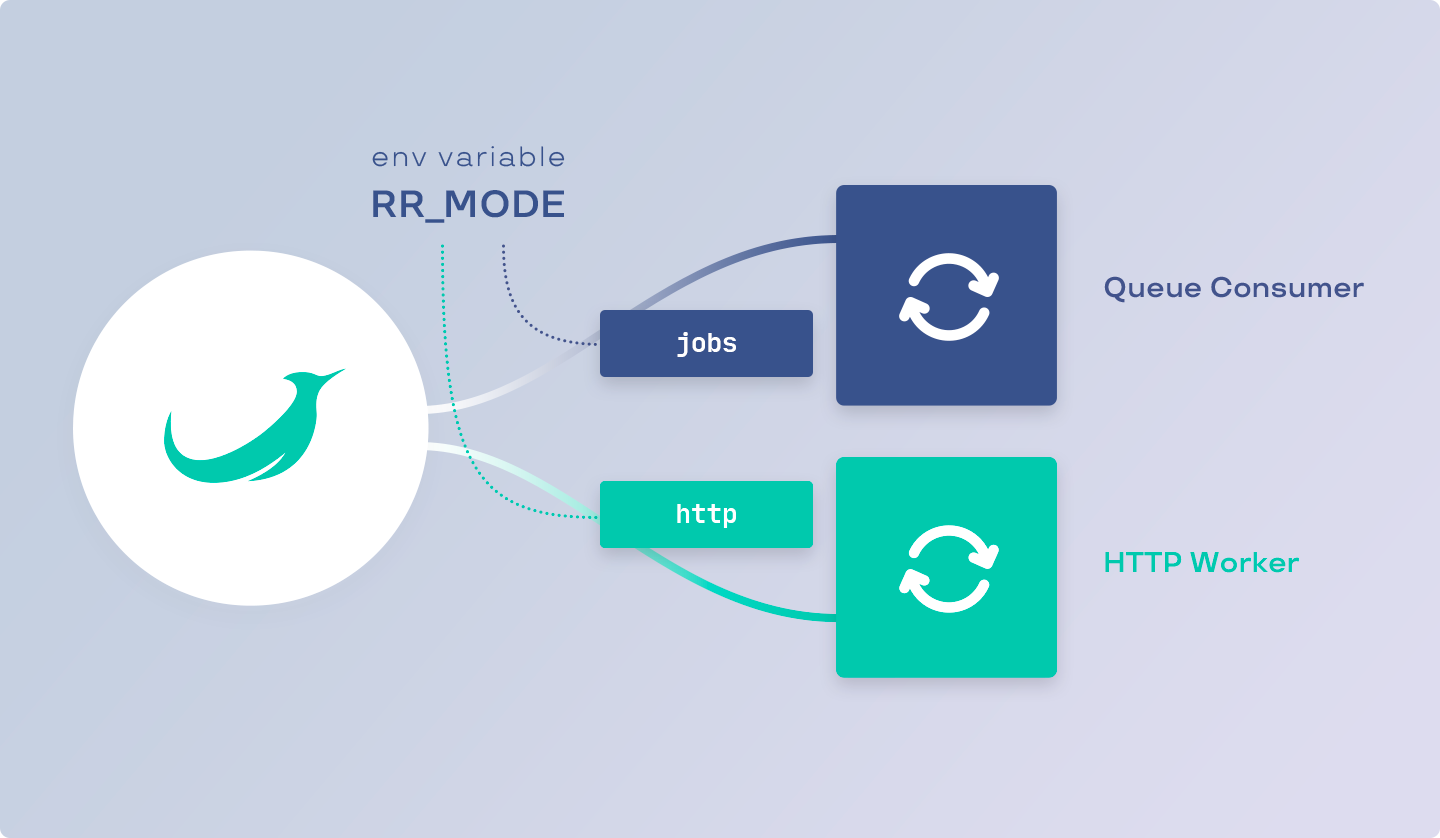 + +There are several ways to check the operating mode from the code: +- By getting the value of the env variable. +- Or using the appropriate API method (from the `spiral/roadrunner-worker` package). + +The second choice may be more preferable in cases where you need to change the +RoadRunner's mode, for example, in tests. + +```php +use Spiral\RoadRunner\Environment; +use Spiral\RoadRunner\Environment\Mode; + +// 1. Using global env variable +$isJobsMode = $_SERVER['RR_MODE'] === 'jobs'; + +// 2. Using RoadRunner's API +$env = Environment::fromGlobals(); + +$isJobsMode = $env->getMode() === Mode::MODE_JOBS; +``` + +After we are convinced of the specialization of the worker, we can write the +corresponding code for processing tasks. To get information about the available +task in the worker, use the +`$consumer->waitTask(): ReceivedTaskInterface` method. + +```php +use Spiral\RoadRunner\Jobs\Consumer; +use Spiral\RoadRunner\Jobs\Task\ReceivedTaskInterface; + + +$consumer = new Consumer(); + +/** @var Spiral\RoadRunner\Jobs\Task\ReceivedTaskInterface $task */ +while ($task = $consumer->waitTask()) { + var_dump($task); +} +``` + +After you receive the task from the queue, you can start processing it in +accordance with the requirements. Don't worry about how much memory or time this +execution takes - the RoadRunner takes over the tasks of managing and +distributing tasks among the workers. + +After you have processed the incoming task, you can execute the +`complete(): void` method. After that, you tell the RoadRunner that you are +ready to handle the next task. + +```php +$consumer = new Spiral\RoadRunner\Jobs\Consumer(); + +while ($task = $consumer->waitTask()) { + + // + // Task handler code + // + + $task->complete(); +} +``` + +We got acquainted with the possibilities of receiving and processing tasks, but +we do not yet know what the received task is. Let's see what data it contains. + +### Task Failing + +In some cases, an error may occur during task processing. In this case, you +should use the `fail()` method, informing the RoadRunner about it. The method +takes two arguments. The first argument is required and expects any string or +string-like (instance of Stringable, for example any exception) value with an +error message. The second is optional and tells the server to restart this task. + +```php +$consumer = new Spiral\RoadRunner\Jobs\Consumer(); +$shouldBeRestarted = false; + +while ($task = $consumer->waitTask()) { + try { + // + // Do something... + // + $task->complete(); + } catch (\Throwable $e) { + $task->fail($e, $shouldBeRestarted); + } +} +``` + +In the case that the next time you restart the task, you should update the +headers, you can use the appropriate method by adding or changing the headers +of the received task. + +```php +$task + ->withHeader('attempts', (int)$task->getHeaderLine('attempts') - 1) + ->withHeader('retry-delay', (int)$task->getHeaderLine('retry-delay') * 2) + ->fail('Something went wrong', requeue: true) +; +``` + +In addition, you can re-specify the task execution delay. For example, in the +code above, you may have noticed the use of a custom header `"retry-delay"`, the +value of which doubled after each restart, so this value can be used to specify +the delay in the next task execution. + +```php +$task + ->withDelay((int)$task->getHeaderLine('retry-delay')) + ->fail('Something went wrong', true) +; +``` + +### Received Task ID + +Each task in the queue has a **unique** identifier. This allows you to +unambiguously identify the task among all existing tasks in all queues, no +matter what name it was received from. + +In addition, it is worth paying attention to the fact that the identifier is not +a sequential number that increases indefinitely. It means that there is still a +chance of an identifier collision, but it is about 1/2.71 quintillion. Even if +you send 1 billion tasks per second, it will take you about 85 years for an ID +collision to occur. + +```php +echo $task->getId(); +// Expected Result +// string(36) "88ca6810-eab9-473d-a8fd-4b4ae457b7dc" +``` + +In the case that you want to store this identifier in the database, it is +recommended to use a binary representation (16 bytes long if your DB requires +blob sizes). + +```php +$binary = hex2bin(str_replace('-', '', $task->getId())); +// Expected Result +// string(16) b"ˆÊh\x10ê¹G=¨ýKJäW·Ü" +``` + +### Received Task Queue + +Since a worker can process several different queues at once, you may need to +somehow determine from which queue the task came. To get the name of the queue, +use the `getQueue(): string` method. + +```php +echo $task->getQueue(); +// Expected +// string(13) "example-queue" +``` + +For example, you can select different task handlers based on different types of +queues. + +```php +// This is just an example of a handler +$handler = $container->get(match($task->getQueue()) { + 'emails' => 'email-handler', + 'billing' => 'billing-handler', + default => throw new InvalidArgumentException('Unprocessable queue [' . $task->getQueue() . ']') +}); + +$handler->process($task); +``` + +### Received Task Name + +The task name is some identifier associated with a specific type of task. For +example, it may contain the name of the task class so that in the future we can +create an object of this task by passing the required data there. To get the +name of the task, use the `getName(): string` method. + +```php +echo $task->getName(); +// Expected +// string(21) "App\\Queue\\Task\\EmailTask" +``` + +Thus, we can implement the creation of a specific task with certain data for +this task. + +```php +$class = $task->getName(); + +if (!class_exists($class)) { + throw new InvalidArgumentException("Unprocessable task [$class]"); +} + +$handler->process($class::fromTask($task)); +``` + +### Received Task Payload + +Each task contains a set of arbitrary user data to be processed within the task. +To obtain this data, you can use one of the available methods: + +**getValue** + +Method `getValue()` returns a specific payload value by key or `null` if no +value was passed. If you want to specify any other default value (for those +cases when the payload with the identifier was not passed), then use the second +argument, passing your own default value there. + +```php +if ($task->getName() !== SendEmailTask::class) { + throw new InvalidArgumentException('Does not look like a mail task'); +} + +echo $task->getValue('email'); // "[email protected]" +echo $task->getValue('username', 'Guest'); // "John" +``` + +**hasValue** + +To check the existence of any value in the payload, use the `hasValue()` method. +This method will return `true` if the value for the payload was passed and `false` +otherwise. + +```php +if (!$task->hasValue('email')) { + throw new InvalidArgumentException('The "email" value is required for this task'); +} + +$email->sendTo($task->getValue('email')); +``` + +**getPayload** + +Also you can get all data at once in `array(string|int $key => mixed $value)` +format using the `getPayload` method. This method may be useful to you in cases +of transferring all data to the DTO. + +```php +$class = $task->getName(); +$arguments = $task->getPayload(); + +$dto = new $class(...$arguments); +``` + +You should pay attention that an array can contain both `int` and `string` +keys, so you should take care of their correct pass to the constructor +yourself. For example, the code above will work completely correctly only in the +case of PHP >= 8.1. And in the case of earlier versions of the language, you +should use the [reflection functionality](https://www.php.net/manual/ru/reflectionclass.newinstanceargs.php), +or pass the payload in some other way. + +Since the handler process is not the one that put this task in the queue, then +if you send any object to the queue, it will be serialized and then automatically +unpacked in the handler. The default serializer suitable for most cases, so you +can even pass `Closure` instances. However, in the case of any specific data +types, you should manage their packing and unpacking yourself, either by +replacing the serializer completely, or for a separate value. In this case, do +not forget to specify this both on the client and consumer side. + +### Received Task Headers + +In the case that you need to get any additional information that is not related +to the task, then for this you should use the functionality of headers. + +For example, headers can convey information about the serializer, encoding, or +other metadata. + +```php +$message = $task->getValue('message'); +$encoding = $task->getHeaderLine('encoding'); + +if (strtolower($encoding) !== 'utf-8') { + $message = iconv($encoding, 'utf-8', $message); +} +``` + +The interface for receiving headers is completely similar to +[PSR-7](https://www.php-fig.org/psr/psr-7/), so methods are available to you: +- `getHeaders(): array<string, array<string, string>>` - Retrieves all task + header values. +- `hasHeader(string): bool` - Checks if a header exists by the given name. +- `getHeader(string): array<string, string>` - Retrieves a message header value + by the given name. +- `getHeaderLine(string): string` - Retrieves a comma-separated string of the + values for a single header by the given name. + +We got acquainted with the data and capabilities that we have in the consumer. +Let's now get down to the basics - sending these messages. + +## Advanced Functionality + +In addition to the main functionality of queues for sending and processing in +API has additional functionality that is not directly related to these tasks. +After we have examined the main functionality, it's time to disassemble the +advanced features. + +### Creating A New Queue + +In the very [first chapter](/beep-beep/jobs.md#configuration), we got acquainted +with the queue settings and drivers for them. In approximately the same way, we +can do almost the same thing with the help of the PHP code using `create()` +method through `Jobs` instance. + +To create a new queue, the following types of DTO are available to you: + +- `Spiral\RoadRunner\Jobs\Queue\AMQPCreateInfo` for AMQP queues. +- `Spiral\RoadRunner\Jobs\Queue\BeanstalkCreateInfo` for Beanstalk queues. +- `Spiral\RoadRunner\Jobs\Queue\MemoryCreateInfo` for in-memory queues. +- `Spiral\RoadRunner\Jobs\Queue\SQSCreateInfo` for SQS queues. + +Such a DTO with the appropriate settings should be passed to the `create()` +method to create the corresponding queue: + +```php +use Spiral\RoadRunner\Jobs\Jobs; +use Spiral\RoadRunner\Jobs\Queue\MemoryCreateInfo; + +$jobs = new Jobs(); + +// +// Create a new "example" in-memory queue +// +$queue = $jobs->create(new MemoryCreateInfo( + name: 'example', + priority: 42, + prefetch: 10, +)); +``` + +### Getting A List Of Queues + +In that case, to get a list of all available queues, you just need to use the +standard functionality of the `foreach` operator. Each element of this collection +will correspond to a specific queue registered in the RoadRunner. And to simply +get the number of all available queues, you can pass a `Job` object to the +`count()` function. + +```php +$jobs = new Spiral\RoadRunner\Jobs\Jobs(); + +foreach ($jobs as $queue) { + var_dump($queue->getName()); + // Expects name of the queue +} + +$count = count($jobs); +// Expects the number of a queues +``` + +### Pausing A Queue + +In addition to the ability to create new queues, there may be times when a queue +needs to be suspended for processing. Such cases can arise, for example, in the +case of deploying a new application, when the processing of tasks should be +suspended during the deployment of new application code. + +In this case, the code will be pretty simple. It is enough to call the `pause()` +method, passing the names of the queues there. In order to start the work of +queues further (unpause), you need to call a similar `resume()` method. + +```php +$jobs = new Spiral\RoadRunner\Jobs\Jobs(); + +// Pause "emails", "billing" and "backups" queues. +$jobs->pause('emails', 'billing', 'backups'); + +// Resuming only "emails" and "billing". +$jobs->resume('emails', 'billing'); +``` + +## RPC Interface + +All communication between PHP and GO made by the RPC calls with protobuf payloads. +You can find versioned proto-payloads here: [Proto](https://github.com/spiral/roadrunner/blob/e9713a1d08a93e2be70c889c600ed89f54822b54/proto/jobs/v1beta). + +- `Push(in *jobsv1beta.PushRequest, out *jobsv1beta.Empty) error` - The + arguments: the first argument is a `PushRequest`, which contains one field + of the `Job` being sent to the queue; the second argument is `Empty`, which + means that the function does not return a result (returns nothing). The error + returned if the request fails. + +- `PushBatch(in *jobsv1beta.PushBatchRequest, out *jobsv1beta.Empty) error` - + The arguments: the first argument is a `PushBatchRequest`, which contains one + repeated (list) field of the `Job` being sent to the queue; the second + argument is `Empty`, which means that the function does not return a result. + The error returned if the request fails. + +- `Pause(in *jobsv1beta.Pipelines, out *jobsv1beta.Empty) error` - The arguments: + the first argument is a `Pipelines`, which contains one repeated (list) + field with the `string` names of the queues to be paused; the second + argument is `Empty`, which means that the function does not return a result. + The error returned if the request fails. + +- `Resume(in *jobsv1beta.Pipelines, out *jobsv1beta.Empty) error` - The + arguments: the first argument is a `Pipelines`, which contains one + repeated (list) field with the `string` names of the queues to be resumed; the + second argument is `Empty`, which means that the function does not return a + result. The error returned if the request fails. + +- `List(in *jobsv1beta.Empty, out *jobsv1beta.Pipelines) error` - The + arguments: the first argument is an `Empty`, meaning that the function does + not accept anything (from the point of view of the PHP API, an empty string + should be passed); the second argument is `Pipelines`, which contains one + repeated (list) field with the `string` names of the all available queues. + The error returned if the request fails. + +- `Declare(in *jobsv1beta.DeclareRequest, out *jobsv1beta.Empty) error` - The + arguments: the first argument is an `DeclareRequest`, which contains one + `map<string, string>` pipeline field of queue configuration; the second + argument is `Empty`, which means that the function does not return a result. + The error returned if the request fails. + +- `Stat(in *jobsv1beta.Empty, out *jobsv1beta.Stats) error` - The arguments: + the first argument is an `Empty`, meaning that the function does not accept + anything (from the point of view of the PHP API, an empty string should be + passed); the second argument is `Stats`, which contains one repeated (list) + field named `Stats` of type `Stat`. The error returned if the request fails. + + +From the PHP point of view, such requests (`List` for example) are as follows: +```php +use Spiral\Goridge\RPC\RPC; +use Spiral\Goridge\RPC\Codec\ProtobufCodec; +use Spiral\RoadRunner\Jobs\DTO\V1\Maintenance; + +$response = RPC::create('tcp://127.0.0.1:6001') + ->withServicePrefix('jobs') + ->withCodec(new ProtobufCodec()) + ->call('List', '', Maintenance::class); +``` diff --git a/docs/beep-beep/kv.md b/docs/beep-beep/kv.md new file mode 100644 index 00000000..0ea41034 --- /dev/null +++ b/docs/beep-beep/kv.md @@ -0,0 +1,679 @@ +# KV (Key-Value) Plugin + +The Key-Value plugin provides the ability to store arbitrary data inside the +RoadRunner between different requests (in case of HTTP application) or different +types of applications. Thus, using [Temporal](https://docs.temporal.io/docs/php/introduction), +for example, you can transfer data inside the [HTTP application](/php/worker.md) +and vice versa. + +As a permanent source of data, the RoadRunner allows you to use popular solutions, +such as [Redis Server](https://redis.io/) or [Memcached](https://memcached.org/), +but in addition it provides others that do not require a separate server, such +as [BoltDB](https://github.com/boltdb/bolt), and also allows you to replace +permanent storage with temporary that stores data in RAM. + + + +## Installation + +> **Requirements** +> - PHP >= 7.4 +> - RoadRunner >= 2.3 +> - *ext-protobuf (optional)* + +To get access from the PHP code, you should put the corresponding dependency +using [the Composer](https://getcomposer.org/). + +```sh +$ composer require spiral/roadrunner-kv +``` + +## Configuration + +After installing all the required dependencies, you need to configure this +plugin. To enable it add `kv` section to your configuration: + +```yaml +rpc: + listen: tcp://127.0.0.1:6001 + +kv: + example: + driver: memory +``` + +Please note that to interact with the KV, you will also need the RPC defined +in `rpc` configuration section. You can read more about the configuration and +methods of creating the RPC connection on the [documentation page here](/beep-beep/rpc.md). + +This configuration initializes this plugin with one storage named "`example`". +In addition, each storage must have a `driver` that indicates the type of +connection used by those storages. In total, at the moment, 4 different types of +drivers are available with their own characteristics and additional settings: +`boltdb`, `redis`, `memcached` and `memory`. + +The `memory` and `boltdb` drivers do not require additional binaries and are +available immediately, while the rest require additional setup. Please see +the appropriate documentation for installing [Redis Server](https://redis.io/) +and/or [Memcached Server](https://memcached.org/). + +### Memory Driver Configuration + +This type of driver is already supported by the RoadRunner and does not require +any additional installations. + +Please note that using this type of storage, all +data is contained in memory and will be destroyed when the RoadRunner Server +is restarted. If you need persistent storage without additional dependencies, +then it is recommended to use the boltdb driver. + +The complete memory driver configuration looks like this: + +```yaml +kv: + # User defined name of the storage. + memory: + # Required section. + # Should be "memory" for the memory driver. + driver: memory + + # Optional section. + # Default: 60 + interval: 60 +``` + +Below is a more detailed description of each of the memory-specific options: + +- `interval` - The interval (in seconds) between checks for the lifetime of the + value in the cache. For large values of the interval, the cache item will be + checked less often for expiration of its lifetime. It is recommended to use + large values only in cases when the cache is used without expiration values, + or in cases when this value is not critical to the architecture of your + application. Note that the lower this value, the higher the load on the + system. + +### Boltdb Driver Configuration + +This type of driver is already supported by the RoadRunner and does not require +any additional installations. + +The complete boltdb driver configuration looks like this: + +```yaml +kv: + # User defined name of the storage. + boltdb: + # Required section. + # Should be "boltdb" for the boltdb driver. + driver: boltdb + + # Optional section. + # Default: "rr.db" + file: "rr.db" + + # Optional section. + # Default: "." + dir: "." + + # Optional section. + # Default: 0777 + permissions: 0777 + + # Optional section. + # Default: "rr" + bucket: "rr" + + # Optional section. + # Default: 60 + interval: 60 +``` + +Below is a more detailed description of each of the boltdb-specific options: + +- `file` - Database file pathname name. In the case that such a file does not + exist in, RoadRunner will create this file on its own at startup. Note that this + must be an existing directory, otherwise a "The system cannot find the path + specified" error will be occurred, indicating that the full database pathname is + invalid. + +- `dir` - The directory prefix string where the database file will be located. + When forming the path to the file, this prefix will be added before the pathname + defined in `file` section. + +- `permissions` - The file permissions in UNIX format of the database file, set + at the time of its creation. If the file already exists, the permissions will + not be changed. + +- `bucket` - The bucket name. You can create several boltdb connections by + specifying different buckets and in this case the data stored in one bucket will + not intersect with the data stored in the other, even if the database file and + other settings are completely identical. + +- `interval` - The interval (in seconds) between checks for the lifetime of the + value in the cache. The meaning and behavior is similar to that used in the + case of the memory driver. + + +### Redis Driver Configuration + +Before configuring the Redis driver, please make sure that the Redis Server is +installed and running. You can read more about this [in the documentation](https://redis.io/). + +In the simplest case, when a full-fledged cluster or a fault-tolerant system is +not required, we have one connection to the Redis Server. The configuration of +such a connection will look like this. + +```yaml +kv: + # User defined name of the storage. + redis: + # Required section. + # Should be "redis" for the redis driver. + driver: redis + + # Optional section. + # By default, one connection will be specified with the + # "localhost:6379" value. + addrs: + - "localhost:6379" + + # Optional section. + # Default: "" + username: "" + + # Optional section. + # Default: "" + password: "" + + # Optional section. + # Default: 0 + db: 0 + + # Optional section. + # Default: 0 (equivalent to the default value of 5 seconds) + dial_timeout: 0 + + # Optional section. + # Default: 0 (equivalent to the default value of 3 retries) + max_retries: 0 + + # Optional section. + # Default: 0 (equivalent to the default value of 8ms) + min_retry_backoff: 0 + + # Optional section. + # Default: 0 (equivalent to the default value of 512ms) + max_retry_backoff: 0 + + # Optional section. + # Default: 0 (equivalent to the default value of 10 connections per CPU). + pool_size: 0 + + # Optional section. + # Default: 0 (do not use idle connections) + min_idle_conns: 0 + + # Optional section. + # Default: 0 (do not close aged connections) + max_conn_age: 0 + + # Optional section. + # Default: 0 (equivalent to the default value of 3s) + read_timeout: 0 + + # Optional section. + # Default: 0 (equivalent to the value specified in the "read_timeout" section) + write_timeout: 0 + + # Optional section. + # Default: 0 (equivalent to the value specified in the "read_timeout" + 1s) + pool_timeout: 0 + + # Optional section. + # Default: 0 (equivalent to the default value of 5m) + idle_timeout: 0 + + # Optional section. + # Default: 0 (equivalent to the default value of 1m) + idle_check_freq: 0 + + # Optional section. + # Default: false + read_only: false +``` + +Below is a more detailed description of each of the Redis-specific options: + +- `addrs` - An array of strings of connections to the Redis Server. Must + contain at least one value of an existing connection in the format of host or + IP address and port, separated by a colon (`:`) character. + +- `username` - Optional value containing the username credentials of the Redis + connection. You can omit this field, or specify an empty string if the + username of the connection is not specified. + +- `password` - Optional value containing the password credentials of the Redis + connection. You can omit this field, or specify an empty string if the + password of the connection is not specified. + +- `db` - An optional identifier for the database used in this connection to the + Redis Server. Read more about databases section on the documentation page for + the description of the [select command](https://redis.io/commands/select). + +- `dial_timeout` - Server connection timeout. A value of `0` is equivalent to a + timeout of 5 seconds (`5s`). After the specified time has elapsed, if the + connection has not been established, a connection error will occur. + + Must be in the format of a "numeric value" + "time format suffix", like "`2h`" where + suffixes means: + - `h` - the number of hours. For example `1h` means 1 hour. + - `m` - the number of minutes. For example `2m` means 2 minutes. + - `s` - the number of seconds. For example `3s` means 3 seconds. + - `ms` - the number of milliseconds. For example `4ms` means 4 milliseconds. + - If no suffix is specified, the value will be interpreted as specified in + nanoseconds. In most cases, this accuracy is redundant and may not be true. + For example `5` means 5 nanoseconds. + + Please note that all time intervals can be suffixed. + +- `max_retries` - Maximum number of retries before giving up. Specifying `0` is + equivalent to the default (`3` attempts). If you need to specify an infinite + number of connection attempts, specify the value `-1`. + +- `min_retry_backoff` - Minimum backoff between each retry. Must be in the format + of a "numeric value" + "time format suffix". A value of `0` is equivalent to a + timeout of 8 milliseconds (`8ms`). A value of `-1` disables backoff. + +- `max_retry_backoff` - Maximum backoff between each retry. Must be in the format + of a "numeric value" + "time format suffix". A value of `0` is equivalent to a + timeout of 512 milliseconds (`512ms`). A value of `-1` disables backoff. + +- `pool_size` - Maximum number of RoadRunner socket connections. A value of `0` + is equivalent to a `10` connections per every CPU. Please note that specifying + the value corresponds to the number of connections **per core**, so if you + have 8 cores in your system, then setting the option to 2 you will get 16 + connections. + +- `min_idle_conns` - Minimum number of idle connections which is useful when + establishing new connection is slow. A value of 0 means no such idle + connections. More details about the problem requiring the presence of this + option available in the [corresponding issue](https://github.com/go-redis/redis/issues/772). + +- `max_conn_age` - Connection age at which client retires (closes) the connection. + A value of `0` is equivalent to a disabling this option. In this case, aged + connections will not be closed. + +- `read_timeout` - Timeout for socket reads. If reached, commands will fail with + a timeout instead of blocking. Must be in the format of a "numeric value" + + "time format suffix". A value of `0` is equivalent to a timeout of 3 seconds + (`3s`). A value of `-1` disables timeout. + +- `write_timeout` - Timeout for socket writes. If reached, commands will fail + with a timeout instead of blocking. A value of `0` is equivalent of the value + specified in the `read_timeout` section. If `read_timeout` value is not + specified, a value of 3 seconds (`3s`) will be used. + +- `pool_timeout` - Amount of time client waits for connection if all connections + are busy before returning an error. A value of `0` is equivalent of the value + specified in the `read_timeout` + `1s`. If `read_timeout` value is not + specified, a value of 4 seconds (`4s`) will be used. + +- `idle_timeout` - Amount of time after which client closes idle connections. + Must be in the format of a "numeric value" + "time format suffix". A value of + `0` is equivalent to a timeout of 5 minutes (`5m`). A value of `-1` disables + idle timeout check. + +- `idle_check_freq` - Frequency of idle checks made by idle connections reaper. + Must be in the format of a "numeric value" + "time format suffix". A value of + `0` is equivalent to a timeout of 1 minute (`1m`). A value of `-1` disables + idle connections reaper. Note, that idle connections are still discarded by + the client if `idle_timeout` is set. + +- `read_only` - An optional boolean value that enables or disables read-only + mode. If `true` value is specified, the writing will be unavailable. + Note that this option **not allowed** when working with Redis Sentinel. + +These are all options available for all Redis connection types. + +#### Redis Cluster + +In the case that you want to configure a [Redis Cluster](https://redis.io/topics/cluster-tutorial), +then you can specify additional options required only if you are organizing this +type of server. + +When creating a cluster, multiple connections are available to you. For example, +you call such a command `redis-cli --cluster create 127.0.0.1:6379 127.0.0.1:6380`, +you should specify the appropriate set of connections. In addition, when +organizing a cluster, two additional options with algorithms for working with +connections will be available to you: `route_by_latency` and `route_randomly`. + +```yaml +kv: + redis: + driver: redis + addrs: + - "127.0.0.1:6379" + - "127.0.0.1:6380" + + # Optional section. + # Default: false + route_by_latency: false + + # Optional section. + # Default: false + route_randomly: false +``` + +Where new options means: + +- `route_by_latency` - Allows routing read-only commands to the closest master + or slave node. If this option is specified, the `read_only` configuration value + will be automatically set to `true`. + +- `route_randomly` - Allows routing read-only commands to the random master or + slave node. If this option is specified, the `read_only` configuration value + will be automatically set to `true`. + +#### Redis Sentinel + +Redis Sentinel provides high availability for Redis. You can find more +information about [Sentinel on the documentation page](https://redis.io/topics/sentinel). + +There are two additional options available for the Sentinel configuration: +`master_name` and `sentinel_password`. + +```yaml +kv: + redis: + driver: redis + + # Required section. + master_name: "" + + # Optional section. + # Default: "" (no password) + sentinel_password: "" +``` + +Where Sentinel's options means: + +- `master_name` - The name of the Sentinel's master in string format. + +- `sentinel_password` - Sentinel password from "requirepass <password>" + (if enabled) in Sentinel configuration. + + +### Memcached Driver Configuration + +Before configuring the Memcached driver, please make sure that the Memcached +Server is installed and running. You can read more about this [in the documentation](https://memcached.org/). + +The complete memcached driver configuration looks like this: + +```yaml +kv: + # User defined name of the storage. + memcached: + # Required section. + # Should be "memcached" for the memcached driver. + driver: memcached + + # Optional section. + # Default: "localhost:11211" + addr: "localhost:11211" +``` + +Below is a more detailed description of each of the memcached-specific options: + +- `addr` - String of memcached connection in format "`[HOST]:[PORT]`". In the case + that there are several memcached servers, then the list of connections can be + listed in an array format, for example: `addr: [ "localhost:11211", "localhost:11222" ]`. + +## Usage + +First, you need to create the RPC connection to the RoadRunner server. You can +specify an address with a connection by hands or use automatic detection if +you run the php code as a [RoadRunner Worker](/php/worker.md). + +```php +use Spiral\RoadRunner\Environment; +use Spiral\Goridge\RPC\RPC; + +// Manual configuration +$rpc = RPC::create('tcp://127.0.0.1:6001'); + +// Autodetection +$env = Environment::fromGlobals(); +$rpc = RPC::create($env->getRPCAddress()); +``` + +After creating the RPC connection, you should create the +`Spiral\RoadRunner\KeyValue\Factory` object for working with storages of KV +RoadRunner plugin. + +The factory object provides two methods for working with the plugin. + +- Method `Factory::isAvailable(): bool` returns boolean `true` value if the + plugin is available and `false` otherwise. + +- Method `Factory::select(string): CacheInterface` receives the name of the + storage as the first argument and returns the implementation of the + [PSR-16](https://www.php-fig.org/psr/psr-16/) `Psr\SimpleCache\CacheInterface` + for interact with the key-value RoadRunner storage. + +```php +use Spiral\Goridge\RPC\RPC; +use Spiral\RoadRunner\KeyValue\Factory; + +$factory = new Factory(RPC::create('tcp://127.0.0.1:6001')); + +if (!$factory->isAvailable()) { + throw new \LogicException('The "kv" RoadRunner plugin not available'); +} + +$storage = $factory->select('storage-name'); +// Expected: +// An instance of Psr\SimpleCache\CacheInterface interface + +$storage->set('key', 'value'); + +echo $storage->get('key'); +// Expected: +// string(5) "string" +``` + +> The `clear()` method available since [RoadRunner v2.3.1](https://github.com/spiral/roadrunner/releases/tag/v2.3.1). + +Apart from this, RoadRunner Key-Value API provides several additional methods: +You can use `getTtl(string): ?\DateTimeInterface` and +`getMultipleTtl(string): iterable<\DateTimeInterface|null>` methods to get +information about the expiration of an item stored in a key-value storage. + +> Please note that the `memcached` driver +> [**does not support**](https://github.com/memcached/memcached/issues/239) +> these methods. + +```php +$ttl = $factory->select('memory') + ->getTtl('key'); +// Expected: +// - An instance of \DateTimeInterface if "key" expiration time is available +// - Or null otherwise + +$ttl = $factory->select('memcached') + ->getTtl('key'); +// Expected: +// Spiral\RoadRunner\KeyValue\Exception\KeyValueException: Storage "memcached" +// does not support kv.TTL RPC method execution. Please use another driver for +// the storage if you require this functionality. +``` + +### Value Serialization + +To save and receive data from the key-value store, the data serialization +mechanism is used. This way you can store and receive arbitrary serializable +objects. + +```php +$storage->set('test', (object)['key' => 'value']); + +$item = $storage->set('test'); +// Expected: +// object(StdClass)#399 (1) { +// ["key"] => string(5) "value" +// } +``` + +To specify your custom serializer, you will need to specify it in the key-value +factory constructor as a second argument, or use the +`Factory::withSerializer(SerializerInterface): self` method. + +```php +use Spiral\Goridge\RPC\RPC; +use Spiral\RoadRunner\KeyValue\Factory; + +$connection = RPC::create('tcp://127.0.0.1:6001'); + +$storage = (new Factory($connection)) + ->withSerializer(new CustomSerializer()) + ->select('storage'); +``` + +In the case that you need a specific serializer for a specific value from the +storage, then you can use a similar method `withSerializer()` for a specific +storage. + +```php +// Using default serializer +$storage->set('key', 'value'); + +// Using custom serializer +$storage + ->withSerializer(new CustomSerializer()) + ->set('key', 'value'); +``` + + +#### Igbinary Value Serialization + +As you know, the serialization mechanism in PHP is not always productive. To +increase the speed of work, it is recommended to use the +[ignbinary extension](https://github.com/igbinary/igbinary). + +- For the Windows OS, you can download it from the + [PECL website](https://windows.php.net/downloads/pecl/releases/igbinary/). + +- In a Linux and MacOS environment, it may be installed with a simple command: +```sh +$ pecl install igbinary +``` + +More detailed installation instructions are [available here](https://github.com/igbinary/igbinary#installing). + +After installing the extension, you just need to install the desired igbinary +serializer in the factory instance. + +```php +use Spiral\Goridge\RPC\RPC; +use Spiral\RoadRunner\KeyValue\Factory; +use Spiral\RoadRunner\KeyValue\Serializer\IgbinarySerializer; + +$storage = (new Factory(RPC::create('tcp://127.0.0.1:6001'))) + ->withSerializer(new IgbinarySerializer()) + ->select('storage'); +// +// Now this $storage is using igbinary serializer. +// +``` + +#### End-to-End Value Encryption + +Some data may contain sensitive information, such as personal data of the user. +In these cases, it is recommended to use data encryption. + +To use encryption, you need to install the +[Sodium extension](https://www.php.net/manual/en/book.sodium.php). + +Next, you should have an encryption key generated using +[sodium_crypto_box_keypair()](https://www.php.net/manual/en/function.sodium-crypto-box-keypair.php) +function. You can do this using the following command: +```sh +$ php -r "echo sodium_crypto_box_keypair();" > keypair.key +``` + +> Do not store security keys in a control versioning systems (like GIT)! + +After generating the keypair, you can use it to encrypt and decrypt the data. + +```php +use Spiral\Goridge\RPC\RPC; +use Spiral\RoadRunner\KeyValue\Factory; +use Spiral\RoadRunner\KeyValue\Serializer\SodiumSerializer; +use Spiral\RoadRunner\KeyValue\Serializer\DefaultSerializer; + +$storage = new Factory(RPC::create('tcp://127.0.0.1:6001')); + ->select('storage'); + +// Encrypted serializer +$key = file_get_contents(__DIR__ . '/path/to/keypair.key'); +$encrypted = new SodiumSerializer($storage->getSerializer(), $key); + +// Storing public data +$storage->set('user.login', 'test'); + +// Storing private data +$storage->withSerializer($encrypted) + ->set('user.email', '[email protected]'); +``` + +## RPC Interface + +All communication between PHP and GO made by the RPC calls with protobuf payloads. +You can find versioned proto-payloads here: [Proto](https://github.com/spiral/roadrunner/tree/v2.3.0/pkg/proto/kv/v1beta). + +- `Has(in *kvv1.Request, out *kvv1.Response)` - The arguments: the first argument +is a `Request` , which declares a `storage` and an array of `Items` ; the second +argument is a `Response`, it will contain `Items` with keys which are present in +the provided via `Request` storage. Item value and timeout are not present in +the response. The error returned if the request fails. + +- `Set(in *kvv1.Request, _ *kvv1.Response)` - The arguments: the first argument +is a `Request` with the `Items` to set; return value isn't used and present here +only because GO's RPC calling convention. The error returned if request fails. + +- `MGet(in *kvv1.Request, out *kvv1.Response)` - The arguments: the first +argument is a `Request` with `Items` which should contain only keys (server +doesn't check other fields); the second argument is `Response` with the `Items`. +Every item will have `key` and `value` set, but without timeout (See: `TTL`). +The error returned if request fails. + +- `MExpire(in *kvv1.Request, _ *kvv1.Response)` - The arguments: the first +argument is a `Request` with `Items` which should contain keys and timeouts set; +return value isn't used and present here only because GO's RPC calling convention. +The error returned if request fails. + +- `TTL(in *kvv1.Request, out *kvv1.Response)` - The arguments: the first argument +is a `Request` with `Items` which should contain keys; return value will contain +keys with their timeouts. The error returned if request fails. + +- `Delete(in *kvv1.Request, _ *kvv1.Response)` - The arguments: the first +argument is a `Request` with `Items` which should contain keys to delete; return +value isn't used and present here only because GO's RPC calling convention. +The error returned if request fails. + +- `Clear(in *kvv1.Request, _ *kvv1.Response)` - The arguments: the first +argument is a `Request` with `storage` which should contain the storage to be +cleaned up; return value isn't used and present here only because GO's RPC +calling convention. The error returned if request fails. + +From the PHP point of view, such requests (`MGet` for example) are as follows: +```php +use Spiral\Goridge\RPC\RPC; +use Spiral\Goridge\RPC\Codec\ProtobufCodec; +use Spiral\RoadRunner\KeyValue\DTO\V1\{Request, Response}; + +$response = RPC::create('tcp://127.0.0.1:6001') + ->withServicePrefix('kv') + ->withCodec(new ProtobufCodec()) + ->call('MGet', new Request([ ... ]), Response::class); +``` diff --git a/docs/beep-beep/local-dev-env.md b/docs/beep-beep/local-dev-env.md new file mode 100644 index 00000000..e69de29b --- /dev/null +++ b/docs/beep-beep/local-dev-env.md diff --git a/docs/beep-beep/logging.md b/docs/beep-beep/logging.md new file mode 100644 index 00000000..cbd5e424 --- /dev/null +++ b/docs/beep-beep/logging.md @@ -0,0 +1,109 @@ +# Logging + +RoadRunner provides the ability to control the log for each plugin individually. + +## Global configuration + +To configure logging globally use `logs` config section: + +```yaml +logs: + mode: production + output: stderr +``` + +To use develop mode. It enables development mode (which makes DPanicLevel logs panic), uses a console encoder, writes to +standard error, and disables sampling. Stacktraces are automatically included on logs of WarnLevel and above. + +```yaml +logs: + mode: development +``` + +To output to separate file: + +```yaml +logs: + mode: production + output: file.log +``` + +To use console friendly output: + +```yaml +logs: + encoding: console # default value +``` + +To suppress messages under specific log level: + +```yaml +logs: + encoding: console # default value + level: info +``` + +### File logger + +It is possibe to redirect channels or whole log output to the file: + +Config sample with file logger: + +```yaml +logs: + mode: development + level: debug + file_logger_options: + log_output: "test.log" + max_size: 10 + max_age: 24 + max_backups: 10 + compress: true +``` + +OR for the log channel: + +```yaml +logs: + mode: development + level: debug + channels: + http: + file_logger_options: + log_output: "test.log" + max_size: 10 + max_age: 24 + max_backups: 10 + compress: true +``` + +1. `log_output`: Filename is the file to write logs to in the same directory. It uses <processname>-lumberjack.log in os.TempDir() if empty. +2. `max_size`: is the maximum size in megabytes of the log file before it gets rotated. It defaults to 100 megabytes. +3. `max_age`: is the maximum number of days to retain old log files based on the timestamp encoded in their filename. Note that a day is defined as 24 hours and may not exactly correspond to calendar days due to daylight savings, leap seconds, etc. The default is not to remove old log files based on age. +4. `max_backups`: is the maximum number of old log files to retain. The default is to retain all old log files (though MaxAge may still cause them to get deleted.) +5. `compress`: determines if the rotated log files should be compressed using gzip. The default is not to perform compression. + +## Channels + +In addition, you can configure each plugin log messages individually using `channels` section: + +```yaml +logs: + encoding: console # default value + level: info + channels: + server.mode: none # disable server logging. Also `off` can be used. + http: + mode: production + output: http.log +``` + +## Summary + +1. Levels: `panic`, `error`, `warn`, `info`, `debug`. Default: `debug`. +2. Encodings: `console`, `json`. Default: `console`. +3. Modes: `production`, `development`, `raw`. Default: `development`. +4. Output: `file.log` or `stderr`, `stdout`. Default `stderr`. +5. Error output: `err_file.log` or `stderr`, `stdout`. Default `stderr`. + +> Feel free to register your own [ZapLogger](https://github.com/uber-go/zap) extensions. diff --git a/docs/beep-beep/metrics.md b/docs/beep-beep/metrics.md new file mode 100644 index 00000000..749b451b --- /dev/null +++ b/docs/beep-beep/metrics.md @@ -0,0 +1,81 @@ +# Application Metrics + +RoadRunner server includes an embedded metrics server based on [Prometheus](https://prometheus.io/). + +## Enable Metrics + +To enable metrics add `metrics` section to your configuration: + +```yaml +metrics: + address: localhost:2112 +``` + +Once complete you can access Prometheus metrics using `http://localhost:2112/metrics` url. + +Make sure to install metrics extension: + +```bash +composer require spiral/roadrunner-metrics +``` + +## Application metrics + +You can also publish application-specific metrics using an RPC connection to the server. First, you have to register a metric in your +configuration file: + +```yaml +metrics: + address: localhost:2112 + collect: + app_metric_counter: + type: counter + help: "Application counter." +``` + +To send metric from the application: + +```php +$metrics = new RoadRunner\Metrics\Metrics( + Goridge\RPC\RPC::create(RoadRunner\Environment::fromGlobals()->getRPCAddress()) +); + +$metrics->add('app_metric_counter', 1); +``` + +> Supported types: gauge, counter, summary, histogram. + +## Tagged metrics + +You can use tagged (labels) metrics to group values: + +```yaml +metrics: + address: localhost:2112 + collect: + app_type_duration: + type: histogram + help: "Application counter." + labels: ["type"] +``` + +You should specify values for your labels while pushing the metric: + +```php +$metrics = new RoadRunner\Metrics\Metrics( + Goridge\RPC\RPC::create(RoadRunner\Environment::fromGlobals()->getRPCAddress()) +); + +$metrics->add('app_type_duration', 0.5, ['some-type']); +``` + +## Declare metrics + +You can declare metric from PHP application itself: + +```php +$metrics->declare( + 'test', + RoadRunner\Metrics\Collector::counter()->withHelp('Test counter') +); +``` diff --git a/docs/beep-beep/plugin.md b/docs/beep-beep/plugin.md new file mode 100644 index 00000000..7d5adf69 --- /dev/null +++ b/docs/beep-beep/plugin.md @@ -0,0 +1,246 @@ +# Writing Plugins + +RoadRunner uses Endure container to manage dependencies. This approach is similar to the PHP Container implementation +with automatic method injection. You can create your own plugins, event listeners, middlewares, etc. + +To define your plugin, create a struct with public `Init` method with error return value (you can use `spiral/errors` as +the `error` package): + +```golang +package custom + +const PluginName = "custom" + +type Plugin struct{} + +func (s *Plugin) Init() error { + return nil +} +``` + +You can register your plugin by creating a custom version of `main.go` file and [building it](/beep-beep/build.md). + +### Dependencies + +You can access other RoadRunner plugins by requesting dependencies in your `Init` method: + +```golang +package custom + +import ( + "github.com/spiral/roadrunner/v2/plugins/http" + "github.com/spiral/roadrunner/v2/plugins/rpc" +) + +type Service struct {} + +func (s *Service) Init(r *rpc.Plugin, rr *http.Plugin) error { + return nil +} +``` + +> Make sure to request dependency as pointer. + +### Configuration + +In most of the cases, your services would require a set of configuration values. RoadRunner can automatically populate +and validate your configuration structure using `config` plugin (via an interface): + +Config sample: + +```yaml +custom: + address: tcp://localhost:8888 +``` + +Plugin: + +```golang +package custom + +import ( + "github.com/spiral/roadrunner/v2/plugins/config" + "github.com/spiral/roadrunner/v2/plugins/http" + "github.com/spiral/roadrunner/v2/plugins/rpc" + + "github.com/spiral/errors" +) + +const PluginName = "custom" + +type Config struct{ + Address string `mapstructure:"address"` +} + +type Plugin struct { + cfg *Config +} + +// You can also initialize some defaults values for config keys +func (cfg *Config) InitDefaults() { + if cfg.Address == "" { + cfg.Address = "tcp://localhost:8088" + } +} + +func (s *Plugin) Init(r *rpc.Plugin, h *http.Plugin, cfg config.Configurer) error { + const op = errors.Op("custom_plugin_init") // error operation name + if !cfg.Has(PluginName) { + return errors.E(op, errors.Disabled) + } + + // unmarshall + err := cfg.UnmarshalKey(PluginName, &s.cfg) + if err != nil { + // Error will stop execution + return errors.E(op, err) + } + + // Init defaults + s.cfg.InitDefaults() + + return nil +} + +``` + +`errors.Disabled` is the special kind of error which indicated Endure to disable this plugin and all dependencies of +this root. The RR2 will continue to work after this error type if at least plugin stay alive. + +### Serving + +Create `Serve` and `Stop` method in your structure to let RoadRunner start and stop your service. + +```golang +type Plugin struct {} + +func (s *Plugin) Serve() chan error { + const op = errors.Op("custom_plugin_serve") + errCh := make(chan error, 1) + + err := s.DoSomeWork() + err != nil { + errCh <- errors.E(op, err) + return errCh + } + + return nil +} + +func (s *Plugin) Stop() error { + return s.stopServing() +} + +func (s *Plugin) DoSomeWork() error { + return nil +} +``` + +`Serve` method is thread-safe. It runs in the separate goroutine which managed by the `Endure` container. The one note, is that you should unblock it when call `Stop` on the container. Otherwise, service will be killed after timeout (can be set in Endure). + +### Collecting dependencies in runtime + +RR2 provide a way to collect dependencies in runtime via `Collects` interface. This is very useful for the middlewares or extending plugins with additional functionality w/o changing it. +Let's create an HTTP middleware: + +Steps (sample based on the actual `http` plugin and `Middleware` interface): + +1. Declare a required interface + +```go +// Middleware interface +type Middleware interface { + Middleware(f http.Handler) http.HandlerFunc +} +``` + +2. Implement method, which should have as an arguments name (`endure.Named` interface) and `Middleware` (step 1). + +```go +// Collects collecting http middlewares +func (s *Plugin) AddMiddleware(name endure.Named, m Middleware) { + s.mdwr[name.Name()] = m +} +``` + +3. Implement `Collects` endure interface for the required structure and return implemented on the step 2 method. + +```golang +// Collects collecting http middlewares +func (s *Plugin) Collects() []interface{} { + return []interface{}{ + s.AddMiddleware, + } +} +``` + +Endure will automatically check that registered structure implement all the arguments for the `AddMiddleware` method (or will find a structure if argument is structure). In our case, a structure should implement `endure.Named` interface (which returns user friendly name for the plugin) and `Middleware` interface. + +### RPC Methods + +You can expose a set of RPC methods for your PHP workers also by using Endure `Collects` interface. Endure will automatically get the structure and expose RPC method under the `PluginName` name. + +To extend your plugin with RPC methods, plugin will not be changed at all. Only 1 thing to do is to create a file with RPC methods (let's call it `rpc.go`) and expose here all RPC methods for the plugin w/o changing plugin itself: +Sample based on the `informer` plugin: + +I assume we created a file `rpc.go`. The next step is to create a structure: + +1. Create a structure: (logger is optional) + +```golang +package custom + +type rpc struct { + srv *Plugin + log logger.Logger +} +``` + +2. Create a method, which you want to expose: + +```go +func (s *rpc) Hello(input string, output *string) error { + *output = input + return nil +} +``` + +3. Use `Collects` interface to expose the RPC service to Endure: + +```go +// CollectTarget resettable service. +func (p *Plugin) CollectTarget(name endure.Named, r Informer) error { + p.registry[name.Name()] = r + return nil +} + +// Collects declares services to be collected. +func (p *Plugin) Collects() []interface{} { + return []interface{}{ + p.CollectTarget, + } +} + +// Name of the service. +func (p *Plugin) Name() string { + return PluginName +} + +// RPCService returns associated rpc service. +func (p *Plugin) RPC() interface{} { + return &rpc{srv: p, log: p.log} +} +``` + +Let's take a look at these methods: + +1. `CollectTarget`: tells Endure, that we want to collect all plugins which implement `endure.Named` and `Informer` interfaces. +2. `Collects`: Endure interface implementation. +3. `Name`: `endure.Named` interface implementation which return a user-friendly plugin name. +4. `RPC`: RPC plugin Collects all plugins which implement `RPC` interface and `endure.Named`. RPC interface accepts no arguments, but returns interface (plugin). + +To use it within PHP using `RPC` [instance](/beep-beep/rpc.md): + +```php +var_dump($rpc->call('custom.Hello', 'world')); +``` diff --git a/docs/beep-beep/production.md b/docs/beep-beep/production.md new file mode 100644 index 00000000..4727f269 --- /dev/null +++ b/docs/beep-beep/production.md @@ -0,0 +1,31 @@ +# Production Usage + +There are multiple tips and suggestions which must be acknowledged while running RoadRunner on production. + +## State and memory + +State and memory are **not shared** between different worker instances but are **shared** for a single worker instance. +Since a single worker typically process more than a single request, you should be careful about it: + +- Make sure to close all descriptors (especially in case of fatal exceptions). +- [optional] consider calling `gc_collect_cycles` after each execution if you want to keep the memory low + (this will slow down your application a bit). +- Watch memory leaks - you have to be more picky about what components you use. Workers will be restarted in case of + a memory leak, but it should not be hard to completely avoid this issue by properly designing your application. +- Avoid state pollution (i.e. globals or user data cache in memory). +- Database connections and any pipe/socket is the potential point of failure. Simple way of dealing with it is to close + all connections after each iteration. Note that it is not the most performant solution. + +## Configuration + +- Make sure NOT to listen 0.0.0.0 in RPC service (unless in Docker). +- Connect to a worker using pipes for higher performance (Unix sockets just a bit slower). +- Tweak your pool timings to the values you like. +- A number of workers = number of CPU threads in your system, unless your application is IO bound, then pick + the number heuristically. +- Consider using `max_jobs` for your workers if you experience any issues with application stability over time. +- RoadRunner is +40% performant using Keep-Alive connections. +- Set memory limit to least 10-20% below `max_memory_usage`. +- Since RoadRunner workers run from cli you need to enable OPcache in CLI via `opcache.enable_cli=1`. +- Make sure to use [health check endpoint](beep-beep/health.md) when running rr in a cloud environment. +- Use `user` option in the config to start workers processes from the particular user on Linux based systems. diff --git a/docs/beep-beep/pubsub.md b/docs/beep-beep/pubsub.md new file mode 100644 index 00000000..b0cc7f44 --- /dev/null +++ b/docs/beep-beep/pubsub.md @@ -0,0 +1,14 @@ +### Pub/Sub + +Roadrunner PubSub interface adds the ability for any storage to implement [Publish/Subscribe messaging paradigm](https://en.wikipedia.org/wiki/Publish%E2%80%93subscribe_pattern). Internally, Roadrunner implements Pub/Sub interface for the `Redis` and `memory` storages. +Pub/Sub interface has 3 major parts: +1. `Publisher`. Should be implemented on storage to give the ability to handle `Publish`, `PublishAsync` RPC calls. This is an entry point for a published message. +2. `Subscriber`. Should be implemented on a storage to subscribe a particular UUID to topics (channels). UUID may represent WebSocket connectionID or any distinct transport. +3. `Reader`. Provide an ability to read `Next` message from the storage. + +--- +#### Samples of implementation: +1. [Websockets](https://github.com/spiral/roadrunner/blob/master/plugins/websockets/plugin.go) plugin +2. [Redis](https://github.com/spiral/roadrunner/blob/master/plugins/redis/plugin.go) plugin +3. [In-memory](https://github.com/spiral/roadrunner/blob/master/plugins/websockets/memory/inMemory.go) storage plugin + diff --git a/docs/beep-beep/reload.md b/docs/beep-beep/reload.md new file mode 100644 index 00000000..32e1e114 --- /dev/null +++ b/docs/beep-beep/reload.md @@ -0,0 +1,28 @@ +# Auto-Reloading +RoadRunner is able to automatically detect PHP file changes and reload connected services. Such approach allows you to develop application without the `max_jobs: 1` or manual server reset. + +## Configuration +To enable reloading for http service: + +```yaml +reload: + # sync interval + interval: 1s + # global patterns to sync + patterns: [ ".php" ] + # list of included for sync services + services: + http: + # recursive search for file patterns to add + recursive: true + # ignored folders + ignore: [ "vendor" ] + # service specific file pattens to sync + patterns: [ ".php", ".go", ".md" ] + # directories to sync. If recursive is set to true, + # recursive sync will be applied only to the directories in `dirs` section + dirs: [ "." ] +``` + +## Performance +The `reload` component will affect the performance of application server. Make sure to use it in development mode only. In the future we have plans to rewrite this plugin to use native OS capabilities of notification events. diff --git a/docs/beep-beep/rpc.md b/docs/beep-beep/rpc.md new file mode 100644 index 00000000..9d0db2ed --- /dev/null +++ b/docs/beep-beep/rpc.md @@ -0,0 +1,32 @@ +# RPC Integration + +You can connect to RoadRunner server from your PHP workers using shared RPC bus. In order to do that you have to create +an instance of `RPC` class configured to work with the address specified in `.rr` file. + +## Requirements + +To connect to RoadRunner from PHP application in RPC mode you need: + +- ext-sockets +- ext-json + +## Configuration + +To change the RPC port from the default (localhost:6001) use: + +```yaml +rpc: + listen: tcp://127.0.0.1:6001 +``` + +```php +$rpc = Goridge\RPC\RPC::create(RoadRunner\Environment::fromGlobals()->getRPCAddress()); +``` + +You can immediately use this RPC to call embedded RPC services such as HTTP: + +```php +var_dump($rpc->call('informer.Workers', 'http')); +``` + +You can read how to create your own services and RPC methods in [this section](/beep-beep/plugin.md). diff --git a/docs/beep-beep/service.md b/docs/beep-beep/service.md new file mode 100644 index 00000000..8a9e4307 --- /dev/null +++ b/docs/beep-beep/service.md @@ -0,0 +1,43 @@ +# Service plugin + +The service plugin was introduced in the RR `v2.0.5`. + +### Main capabilities + +1. Execute PHP code, binaries, bash/powershell scripts. +2. Restart after specified amount of time. +3. Control execute time for the particular command. +4. Provide statistic to the `Informer` plugin about `%CPU`, `PID` and used `RSS memory`. + +### Config + +```yaml +service: + some_service_1: + command: "php tests/plugins/service/test_files/loop.php" + process_num: 10 + exec_timeout: 0 + remain_after_exit: true + restart_sec: 1 + + some_service_2: + command: "tests/plugins/service/test_files/test_binary" + process_num: 1 + remain_after_exit: true + restart_delay: 1s + exec_timeout: 0 +``` + +Description: + +1. Service plugin supports any number of nested commands. +2. `command` - command to execute. There are no limitations on commands here. Here could be binary, PHP file, script, + etc. +3. `process_num` - default: 1, number of processes for the command to fire. +4. `exec_timeout` - default: 0 (unlimited), maximum allowed time to run for the process. +5. `remain_after_exit` - default: false. Remain process after exit. For example, if you need to restart process every 10 + seconds + `exec_timeout` should be 10s, and `remain_after_exit` should be set to true. NOTE: if you kill the process from + outside and if `remain_after_exit` will be true, the process will be restarted. + +6. `restart_sec` - default: 30 seconds. Delay between process stop and restart.
\ No newline at end of file diff --git a/docs/beep-beep/systemd.md b/docs/beep-beep/systemd.md new file mode 100644 index 00000000..62fcef34 --- /dev/null +++ b/docs/beep-beep/systemd.md @@ -0,0 +1,20 @@ +# Running a RR server as daemon on Linux + +In the RR repository you can find rr.server systemd unit file. The structure of the file is the following: +```unit file (systemd) +[Unit] +Description=High-performance PHP application server + +[Service] +Type=simple +ExecStart=/usr/local/bin/roadrunner serve -c <path/to/.rr.yaml> +Restart=always +RestartSec=30 + +[Install] +WantedBy=default.target +``` +The only thing that user should do is to update `ExecStart` option with your own. To do that, set a proper path of `roadrunner` binary, required flags and path to the .rr.yaml file. +Usually, such user unit files are located in `.config/systemd/user/`. For RR, it might be `.config/systemd/user/rr.service`. To enable it use the following commands: `systemctl enable --user rr.service` and `systemctl start rr.service`. And that's it. Now roadrunner should run as daemon on your server. + +Also, you can find more info about systemd unit files here: [Link](https://wiki.archlinux.org/index.php/systemd#Writing_unit_files). diff --git a/docs/beep-beep/websockets.md b/docs/beep-beep/websockets.md new file mode 100644 index 00000000..790a120d --- /dev/null +++ b/docs/beep-beep/websockets.md @@ -0,0 +1,45 @@ +### Websockets + +Websockets plugins add WebSockets broadcasting features to the Roadrunner. It +implements [PubSub](https://github.com/spiral/roadrunner/blob/master/pkg/pubsub/interface.go) interface. + +#### Protobuf + +Websockets plugin uses protobuf messages for the RPC calls (PHP part). The same messages, but JSON-encoded used on the +client side (browser, devices). All proto messages located in the +Roadrunner [pkg](https://github.com/spiral/roadrunner/tree/master/pkg/proto/websockets) folder. + +#### RPC interface + +1. `Publish(in *websocketsv1.Request, out *websocketsv1.Response)`: The arguments: first argument is a `Request` , which + declares a `broker`, `topics` to push the payload and `payload`; the second argument is a `Response`, it will contain + only 1 bool value which used as a signal of error. + The error returned if the request fails. + +2. `PublishAsync(in *websocketsv1.Request, out *websocketsv1.Response)`: The arguments: first argument is a `Request` , + which declares a `broker`, `topics` to push the payload and `payload`; the second argument is a `Response`, it will + contain only 1 bool value which used as a signal of error. + The difference between `Publish` and `PublishAsync` that `PublishAsync` doesn't wait for a broker's response. + The error returned if the request fails. + +#### Clients + +Client payload is the same as used in the RPC operations except that `command` field should be used. Commands can be as +following: + +1. `join` - to join a specified topics. For successful `join` server returns a response with joined topics: + `{"topic":"@join","payload":["foo","foo2"]}`. Otherwise, the server returns an error or unsuccessful `join` response: + `{"topic":"#join","payload":["foo","foo2"]}`. + Sample of `join` command:`{"command":"join","broker":"memory","topics":["foo","foo2"],"payload":""}` + + +2. `leave` - to leave a specified topics. For successful `leave` server returns a response with a left topics: + `{"topic":"@leave","payload":["foo","foo2"]}`. Otherwise, the server returns an error or unsuccessful `leave` + response: + `{"topic":"#leave","payload":["foo","foo2"]}`. Sample of `leave` + command: `{"command":"leave","broker":"memory","topics":["foo","foo2"],"payload":""}` + +#### Architecture + +The architecture diagram for the WebSockets plugin can be +found [here](https://github.com/spiral/roadrunner/tree/master/plugins/websockets/doc) |